Alan Briggs The Power Of A Words 2024-02-20T10:58:33Z https://www.alanbriggs.net/feed/atom/ WordPress https://www.alanbriggs.net/wp-content/uploads/img-logo-1.jpg Alan Briggs http://www.alanbriggs.net <![CDATA[DIY Projector Screen Ideas for Your Home Theater]]> http://www.alanbriggs.net/?p=156 2024-02-20T10:58:33Z 2024-02-20T10:57:34Z Creating a captivating home theater experience doesn’t always necessitate breaking the bank. In fact, one of the most critical components, the projector screen, can be crafted at home with a little creativity and resourcefulness. Whether you’re aiming for a basic setup or seeking to push the boundaries of DIY ingenuity, there’s a projector screen solution […]

The post DIY Projector Screen Ideas for Your Home Theater first appeared on Alan Briggs.]]>
Creating a captivating home theater experience doesn’t always necessitate breaking the bank. In fact, one of the most critical components, the projector screen, can be crafted at home with a little creativity and resourcefulness. Whether you’re aiming for a basic setup or seeking to push the boundaries of DIY ingenuity, there’s a projector screen solution suited to your needs.

Creative DIY Projector Screen Ideas

Retractable Screen:

Looking to maximize space in your home theater? Consider crafting a retractable projector screen using readily available materials like PVC pipes and blackout cloth. Begin by measuring the desired screen size and cutting the PVC pipes to fit. Assemble the frame using elbow joints and T-joints, ensuring it’s sturdy and square. Next, attach the blackout cloth to the frame using adhesive or staples, ensuring it’s taut and free from wrinkles. Install hooks or brackets on the wall or ceiling to support the screen, allowing for easy retractability when not in use. With this DIY solution, you can enjoy a seamless viewing experience without sacrificing precious space.

projectors

Upcycled Materials:

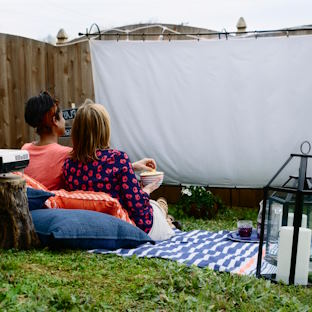
Transforming ordinary household items into a projector screen is not only eco-friendly but also incredibly inventive. Raid your linen closet for old bed sheets, scour the bathroom for unused shower curtains, or repurpose worn-out window blinds. Simply attach the chosen material to a sturdy frame, such as a wooden frame or even a clothesline, ensuring it’s stretched tightly to avoid any wrinkles or creases. The versatility of upcycled materials allows for customization in size and shape, making it an ideal solution for unconventional viewing spaces or temporary setups. Get creative with your choices and let your imagination run wild as you turn everyday items into a unique projector screen masterpiece.

Custom Frame Screen:

For those seeking a more polished and professional look, constructing a custom frame screen offers endless possibilities. Utilizing materials like wood or PVC pipes, build a frame to your desired dimensions, ensuring it’s square and sturdy. Stretch a high-quality projector screen fabric over the frame, securing it tightly with staples or adhesive. Add finishing touches such as trim or paint to enhance aesthetics and conceal any imperfections. The beauty of a custom frame screen lies in its versatility and durability, providing a long-lasting solution for your home theater needs. Let your craftsmanship shine as you create a personalized projector screen that’s as functional as it is stylish.

Advanced DIY Projector Screen Ideas

Ambient Light Rejecting (ALR) Screen:

Ambient light can significantly impact the viewing experience in a home theater setup, but with an Ambient Light Rejecting (ALR) screen, you can enjoy crisp, vibrant images even in brightly lit environments. ALR screens utilize specialized materials to reflect light from the projector while absorbing ambient light, resulting in improved contrast and brightness. While commercial ALR screens can be costly, DIY enthusiasts can achieve a similar effect using innovative methods and materials. Explore options like ALR paint or ALR fabric, which can be applied to a suitable surface or stretched over a custom frame to create your own ALR screen at a fraction of the cost. With a DIY ALR screen, you can elevate your viewing experience without breaking the bank.

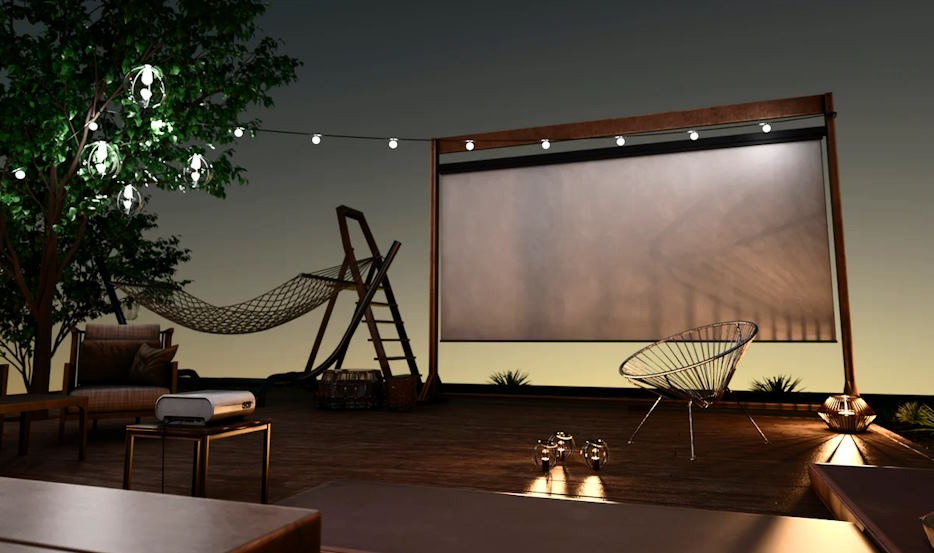
Curved Projector Screen:

Enhance your immersion and viewing angles with a curved projector screen, a popular choice among home theater enthusiasts seeking to replicate the cinematic experience. Building a curved projector screen may seem daunting, but with the right guidance, it’s entirely achievable as a DIY project. Begin by constructing a frame using flexible materials like PVC pipes or lightweight wood, shaping it into a gentle curve. Stretch a high-quality projector screen fabric over the frame, ensuring it maintains its curvature for optimal viewing. The curved design helps to eliminate image distortion and provides a more uniform viewing experience, making your home theater feel like a true cinematic escape.

Motorized Retractable Screen:

For the ultimate in convenience and sophistication, consider constructing a motorized retractable projector screen with remote control functionality. While commercial motorized screens can be expensive, DIY enthusiasts can save a considerable amount by building their own. Start by designing a sturdy frame capable of supporting the screen material and motor mechanism. Install a motorized roller system and attach the projector screen fabric securely. Incorporate a remote control system for seamless operation, allowing you to retract or deploy the screen with the touch of a button. With a DIY motorized retractable screen, you can enjoy the luxury of a professional-grade home theater experience without the hefty price tag.

Tips for Enhancing DIY Projector Screens

Proper Screen Size and Aspect Ratio Selection:

Choosing the right screen size and aspect ratio is crucial for optimizing your viewing experience. Consider factors such as the viewing distance, room size, and projector specifications when determining the ideal screen size. Additionally, ensure the aspect ratio matches that of your content to avoid stretching or cropping issues. Take measurements carefully and research recommended screen sizes for your setup to achieve the best possible results.

Techniques for Achieving a Smooth Surface and Avoiding Wrinkles:

A smooth surface is essential for maximizing image quality and minimizing distractions during viewing. When constructing or installing your DIY projector screen, take care to eliminate any wrinkles or creases. Stretch the screen fabric tightly over the frame and secure it evenly to prevent sagging or distortion. Use a heat gun or gentle tensioning to remove wrinkles, and consider using tensioning systems or weights to maintain tension over time.

Calibration and Optimization for Best Image Quality:

Once your DIY projector screen is in place, take the time to calibrate and optimize your projector settings for optimal image quality. Adjust parameters such as brightness, contrast, color temperature, and sharpness to achieve a balanced and vibrant image. Utilize calibration tools or software for more precise adjustments, and regularly check and update settings as needed to maintain optimal performance.

The post DIY Projector Screen Ideas for Your Home Theater first appeared on Alan Briggs.]]>
Alan Briggs http://www.alanbriggs.net <![CDATA[Exploring the Benefits of Preamp Outputs in High-End AV Receivers]]> http://www.alanbriggs.net/?p=150 2024-01-19T14:19:33Z 2024-01-04T14:14:48Z As technology continues to advance, audio enthusiasts find themselves immersed in a world of possibilities for crafting the ultimate home audio experience. Preamp outputs, often overshadowed by more prominent features, are the unsung heroes that can make or break the audiophile’s dream setup. Whether you’re a seasoned audio connoisseur or a budding enthusiast, understanding the […]

The post Exploring the Benefits of Preamp Outputs in High-End AV Receivers first appeared on Alan Briggs.]]>
As technology continues to advance, audio enthusiasts find themselves immersed in a world of possibilities for crafting the ultimate home audio experience. Preamp outputs, often overshadowed by more prominent features, are the unsung heroes that can make or break the audiophile’s dream setup. Whether you’re a seasoned audio connoisseur or a budding enthusiast, understanding the role of preamp outputs is key to unlocking the full potential of your high-end AV receiver.

Understanding Preamp Outputs

Audio enthusiasts often encounter the term “preamp outputs” in discussions surrounding high-end Pioneer avr. To demystify their significance, let’s delve into the core functionality and types of preamp outputs that contribute to the heart of any sophisticated audio setup.

Explanation of Preamp Functionality

At its essence, a preamplifier, or preamp, serves as the intermediary between audio sources and power amplifiers. The primary function is to take the relatively weak audio signals from various sources such as CD players, turntables, or streaming devices and boost them to a level suitable for amplification. Beyond mere amplification, preamps also play a crucial role in shaping and refining the audio signal, contributing to the overall quality of the sound that reaches the speakers.

types of preamp outputs

Different Types of Preamp Outputs

  • RCA Preamp Outputs: RCA (Radio Corporation of America) connectors are a common sight in audio setups. RCA preamp outputs are prevalent in most consumer audio equipment, providing a straightforward and widely compatible connection for transmitting audio signals.
  • XLR Preamp Outputs: XLR (External Line Return) connectors, often associated with professional audio setups, offer a balanced connection. Known for their ability to reduce interference and transmit signals over longer distances without signal degradation, XLR preamp outputs are favored in high-end audio applications.

Importance of Preamp Outputs in Audio Systems

The importance of preamp outputs lies in their ability to ensure signal purity, minimize interference, and allow for precise control over audio signals. Whether you’re a meticulous audiophile or a casual listener, understanding the role of preamp outputs is fundamental to appreciating the intricate dance of technology that brings your favorite tunes to life.

Choosing the Right AV Receiver with Preamp Outputs

Selecting the ideal AV receiver can be a pivotal decision in curating a stellar audio setup. When specifically considering models with preamp outputs, a thoughtful approach ensures that your investment aligns seamlessly with your audio aspirations.

Key Considerations in AV Receiver Selection

Begin by identifying your specific audio needs. Consider factors such as the room size, desired audio sources, and whether you intend to build a multi-zone system. Evaluate the power output, channel configuration, and the supported audio formats to ensure compatibility with your audio preferences.

Compatibility with Existing Audio Components

Harmony in an audio setup relies on the synergy between components. Check the compatibility of the AV receiver’s preamp outputs with your existing audio components. Whether you have high-end amplifiers or specialized speakers, ensuring that they integrate effortlessly is essential for a cohesive and high-fidelity sound experience.

Budget Considerations and Value for Money

While high-end AV receivers with preamp outputs offer an array of features, it’s crucial to strike a balance between your budget and the desired functionality. Assess the value each model brings in terms of build quality, supported technologies, and overall performance. Seek out options that not only fit your financial considerations but also provide a long-term investment in audio satisfaction.

The post Exploring the Benefits of Preamp Outputs in High-End AV Receivers first appeared on Alan Briggs.]]>
Alan Briggs http://www.alanbriggs.net <![CDATA[Easy Instructions to Build Your Own DIY Speaker Stand]]> http://www.alanbriggs.net/?p=139 2024-01-19T14:14:44Z 2021-10-11T07:30:27Z The speaker is the heart of your home entertainment system. The sound quality, level of bass, and clarity are all determined by the features of your speakers. For some people, it’s more convenient to have a set-up that doesn’t require you to put anything on top of your TV or dresser. If this sounds like […]

The post Easy Instructions to Build Your Own DIY Speaker Stand first appeared on Alan Briggs.]]>
The speaker is the heart of your home entertainment system. The sound quality, level of bass, and clarity are all determined by the features of your speakers. For some people, it’s more convenient to have a set-up that doesn’t require you to put anything on top of your TV or dresser. If this sounds like you, then go ahead and get started with building your DIY speaker stand!

Do you have a speaker that is gathering dust? Does it look like this: Well, if you’re looking for ways to make your speaker more practical, then read on! You’ll be able to use the same stand with different types of speakers and move it from one room to another without having to worry about carrying heavy equipment around the house. And the best part is that these stands are so cheap and easy to make that there’s no reason not to give them a try! Let’s get started…

How do you make a good speaker stand?

Speaker stands

If you’re like me and enjoy listening to your favorite music or watching a movie, but don’t want to keep the volume on high all the time because of neighbors, then this DIY might be for you, but if you don’t want to do it yourself, these are great bookshelf speaker stands. This project will take about 3 hours (plus drying time) and is best suited for people who are handy with tools. You’ll need: A drill with a 1/2 inch bit, 4-inch angle grinder w/ cut off wheel attachment, hacksaw w/ blade set at five teeth per inch, MIG welder & gasless flux core wire feeder.

The first step in building your speaker stand is measuring where the base should go and cutting an appropriately sized hole using saws.

We’re going to use two pieces of 2×4 lumber that are each 10 inches long, one piece of 1×6 lumber that is 12 inches long, and one 6 inches by the 12-inch board. For the screws, we will use 3/4 inch round head screws which are used in construction work. We’ll also need four small nails or finishing nails if you prefer not to have visible screw heads on your project.

DIY speaker stand ideas

Speaker stands diy

Have you ever walked into a room and realized that your speakers are not at the proper height? This can be a problem when trying to enjoy the sound, but it doesn’t have to be. Building a DIY bookshelf speaker stand is easy to solve this problem without spending any money on expensive stands.

  • Step 1: Measure Your Speakers- This step will require measuring from the top of the speaker down until you reach the desired height. The measurements should include inches and centimeters for accuracy purposes.
  • Step 2: Purchase Materials Needed For Build- You’ll need some wood or another material sturdy enough to hold your speakers in place while also being aesthetical.

Ever since I was a kid, I have always wanted to make my speaker stand. And after years of waiting and saving up the money, I finally did it! It took me about two hours from start to finish. The whole project cost less than $400 total and looks excellent in my living room. Why haven’t you built your own yet?

I will show you how easy it is with this blog post. Check out these pictures below for inspiration on what your speaker stand can look like.

The post Easy Instructions to Build Your Own DIY Speaker Stand first appeared on Alan Briggs.]]>
Alan Briggs http://www.alanbriggs.net <![CDATA[How do You Pair Soundpeats Truecapsule?]]> http://www.alanbriggs.net/?p=119 2020-10-21T08:06:40Z 2020-09-02T10:10:44Z The SoundPeatsTrueCapsule has features of IPX5 water resistance, touch control, and Support Bluetooth 5.0. It is made of the compact package along with the charging case of earbuds. Soundpeats have micro-USB charging cable and black is the only color option in it. The overall weight of the earbud 47g and the kit has a new […]

The post How do You Pair Soundpeats Truecapsule? first appeared on Alan Briggs.]]>
The SoundPeatsTrueCapsule has features of IPX5 water resistance, touch control, and Support Bluetooth 5.0. It is made of the compact package along with the charging case of earbuds. Soundpeats have micro-USB charging cable and black is the only color option in it.

The overall weight of the earbud 47g and the kit has a new Soundpeats logo on its lid.

soundpeats truecapsule

The quality of the earbud is good and has a smooth matte finish. The earbud finds little fiddly to open because of its magnetic closure. The overall length of the bud is 43mm with a 7mm thick stem with a microphone on the bottom and Soundpeats down the outside of each earbud.

There are few tips to pair Soundpeats Truecapsule.

Pairing in SoundpeatsTruecapsule

Pairing occurs automatically in earbuds, the right side of earbuds flashes white and red indicates pairing mode. Connect earbuds of the true capsule in your Bluetooth device settings. Voice prompt connection, power, and pairing status.

The right-side of the earbud connects on its own while the left side doesn’t fix individually. At this stage it becomes complex and the buds reconnect automatically with the last connected device when you take them out from the case. You can also connect to one device at a time.

soundpeats truecapsule

Audio quality, performance, and battery life

The sound quality of the buds is extraordinary, you can use the TrueCapsules earbuds for phone calls and they perform binaural audio. It means the sounds come from both rights and left earbuds. It is easy for connecting Soundpeats Truecapsule in your Bluetooth device. The sound isolation is good, particularly with perfect fitting ear tips. It is very difficult to find the faults in SoundPeatsTruecapsules especially in their budget price.

Holding and tapping the left and right earbud for the second play of the previous and next track respectively. The earbuds in Soundpeats are very easy to handle and has better audio quality.

The post How do You Pair Soundpeats Truecapsule? first appeared on Alan Briggs.]]>
Alan Briggs http://www.alanbriggs.net <![CDATA[How Can I Make My Phone Speaker Louder?]]> http://www.alanbriggs.net/?p=97 2020-10-21T08:06:52Z 2020-08-29T09:47:10Z There are multiple ways to increase the speaker in Android if you feel the sounds aren’t as loud as you like. Escalating the volume capacity of an android device is as simple as changing the position or difficult as much as deforming the equalizer settings. Android is most suitable for regular use but at the […]

The post How Can I Make My Phone Speaker Louder? first appeared on Alan Briggs.]]>
There are multiple ways to increase the speaker in Android if you feel the sounds aren’t as loud as you like. Escalating the volume capacity of an android device is as simple as changing the position or difficult as much as deforming the equalizer settings.

Android is most suitable for regular use but at the time you wish to increase the Android device on a louder volume beyond its usual sound. Different ways are enabled for making a phone speaker louder

phone speaker

Change the position of Android device

The simpler way to increase the volume of Android by adjusting the position of the device and now you can hear well. Identical to placing a speaker closer to your ears know you can hear the person’s voice on the other line. Here are some tips for improving the sound quality on Smartphone.

Turn round your android device until you find the angle where you can hear louder and place the phone on that position. Plugging the headphones or ears will improve the Androids device sound quality and volume. Keep your android phone in a bowl or round object the shape of the object acts as an amplifier, revokes the speaker system of the android device.

Connect to the external speaker

Bluetooth plays a major role in increasing the sounds in Android. People pair their devices with Bluetooth to improve the sound system. Many Bluetooth devices are available, such as Flip4, JBI each has its pros and cons. Every Bluetooth speaker is appropriate for an android device.

phone speaker

Increase the volume limiter

If your android device couldn’t find louder volume then make sure your volume limiter isn’t restricting you. Follow the steps to increase the sound setting.

Open the setting app in your android device. Click on Sound and vibration. Tap the volume and in the upper right corner of the screen. Click on the vertical dots and tap the media volume limiter. If you find the volume limiter is in off mode then slide the off section to turn the limiter on.

Adjust the equalizer setting

Equalizer setting is the advanced method to increase the volume of your android device, the following methods involve the equalizer settings.

Open the setting app on your android device. Tap on sound and vibration. Proceed it to advanced sound setting.

Finally, tap on sound quality and effects equalizer helps in making music louder on a phone then select genre you want.

The post How Can I Make My Phone Speaker Louder? first appeared on Alan Briggs.]]>
Alan Briggs http://www.alanbriggs.net <![CDATA[Difference Between the Cheap and Expensive Microphone, Purchase as Per Its Efficiency]]> http://www.alanbriggs.net/?p=57 2020-09-02T09:39:36Z 2020-08-08T12:28:24Z Microphones are commonly used by filmmakers and video professionals; your project will succeed only if you have good audio quality. For better audio equipment, microphones are more important at the time of the shoot. Many people argue that the difference between a cheap and expensive microphone, but picking up the right microphone is very mandatory […]

The post Difference Between the Cheap and Expensive Microphone, Purchase as Per Its Efficiency first appeared on Alan Briggs.]]>
Microphones are commonly used by filmmakers and video professionals; your project will succeed only if you have good audio quality. For better audio equipment, microphones are more important at the time of the shoot. Many people argue that the difference between a cheap and expensive microphone, but picking up the right microphone is very mandatory for the job. Let’s have a look at Cheap vs expensive microphone which are available in the town.

Comparing cheap vs expensive microphone

Every microphone endeavours a polar pattern, it defines the microphone’s audio coverage. Cardioid is more effective in the front pattern while it has no pickup at the back. Compared to the omnidirectional microphone it is sensitive at all the angles and also picks up the sound quality from all the directions. Filmmakers commonly use a Stagun microphone to capture the audio from Super Cardioid or Cardid, likewise omnidirectional is designed to cover the things like room tone.

The dynamic range of microphone

Looking at the difference between cheap and extensive microphones, the most important aspect is the microphone’s dynamic range. A trustable microphone holds recordings in the largest max SPL and smallest in noise floor signals. Working with a dynamic range microphone you will lose identical information while taking footage on a cheap DSLR and high-end cinema cameras.

Frequency response

The different microphone offers different ranges from 20HZ to 20 kHz. It indicates the microphone frequency range; a better microphone has a greater range than the cheapest one. Along with all these factors using cheap mic vs expensive mic, our human ear can hear only 20 HZ to 20KZ.

frequency response

Impedance in Microphone

Most of the microphone is Ac voltage impedance; audio signals are controlled by impedance. To travel signals optically, the microphone is connected with input impedance. Either cheap or expensive microphones have output impedance like devices that generate AC voltage signals. Resistors, capacitors, and all the electronics play a consequent role in determining microphone overall resistance. Every microphone has a greater range of impedance signals.

Conclusion

Microphone along with polar pattern, frequency response, and dynamic range, also emphasize other factors, like sensitivity, s/n ratio, and maximum SPL. Microphone holds weight, dimension, and power suppliers. Combining all these factors it provides a better and easy handling microphone. Start your career with audio quality recording packages or else but your gear by choosing a top-of-line microphone can be a good investment.

The post Difference Between the Cheap and Expensive Microphone, Purchase as Per Its Efficiency first appeared on Alan Briggs.]]>
Alan Briggs http://www.alanbriggs.net <![CDATA[Can I Get SoundCloud on My Smart TV?]]> http://www.alanbriggs.net/?p=112 2020-10-21T08:07:00Z 2020-07-28T10:04:32Z SoundCloud is the most famous in the audio distribution system. SoundCloud wirelessly plays music and other audio files from the selected gadgets and even the home audio system. The audio broadcasting app now supports Android TV, Chromecast, and other devices that control cast technology. SoundCloud for Smart TV Soundcloud provides information between Http or https […]

The post Can I Get SoundCloud on My Smart TV? first appeared on Alan Briggs.]]>
SoundCloud is the most famous in the audio distribution system. SoundCloud wirelessly plays music and other audio files from the selected gadgets and even the home audio system. The audio broadcasting app now supports Android TV, Chromecast, and other devices that control cast technology.

SoundCloud Smart TV

SoundCloud for Smart TV

Soundcloud provides information between Http or https protocol. Smart-tv uses a file system for streaming the videos. The request can’t be sent to the Smart Cloud and the information can’t be accepted by the API. One can authorize SoundCloud HTTP API with SmartTV. There are steps for getting SoundCloud on the smart TV.

Install the Soundcloud

Soundcloud can be installed directly from the App Store, it has specific features such as speed control, equalizer, audio bookmarks, and sleep timer. Chrome support is the main feature in Soundcloud. Once you have installed the app then you can directly access the account and all the uploaded data appear in the Account tab.

SoundCloud Smart TV

New music is found in Soundcloud

You can hear your favourite songs by using a sound cloud, open the top charts tab, and search for the song on the top of the screen. Click on the content type using segment control and press the search button. Find your audiobooks on Soundcloud and put them on your favourite album. Two features are available for listening to SoundCloud on the smart TV by speeding up the playback from 0.2x to 2.0x. Open your audio bookmarks by saving the playback position and start listening to your music.

Equalizer in Soundcloud

You can change the frequency in Soundcloud from -12 to +12 decibels and carry out with inbuilt brass booster, jazz, treble reducer, booster, and also varies in features. Finally, stream your music in your SoundCloud to Chromecast in your smart TV.

The post Can I Get SoundCloud on My Smart TV? first appeared on Alan Briggs.]]>
Alan Briggs http://www.alanbriggs.net <![CDATA[How do I Choose the Right Microphone for My Voice?]]> http://www.alanbriggs.net/?p=58 2020-09-02T09:40:00Z 2020-07-15T12:28:25Z When you are trying to purchase a microphone be sure that the microphone should bring justice to your voice and help to forecast your talent. Pick your right microphone not by the best price rather pick it up which is right for your voice.  Choosing a correct headphone depends upon your unique voice, the individual […]

The post How do I Choose the Right Microphone for My Voice? first appeared on Alan Briggs.]]>
When you are trying to purchase a microphone be sure that the microphone should bring justice to your voice and help to forecast your talent. Pick your right microphone not by the best price rather pick it up which is right for your voice.  Choosing a correct headphone depends upon your unique voice, the individual alone knows which suits them most. Here are few tips to choose the right microphone for the voice you have; this guideline will assist your which kind of microphone picks up your voice.

Usability determination and Vocal direction

Plug and play is the best option for choosing a better microphone. Determine which type of directional pattern or Microphone Polar pattern, suits for your voice. More focused directional microphones are best for voice overs. You can also prefer for a cardiod or a hybercardiod polar pattern. These patterns help to minimize the room tone and ambient noise; hence it is designed to take up the sound of the microphone front position in a closure pattern.

vocal direction

Know about the microphone frequency response

Microphones like RE20 are larger diaphragm microphones. This type of microphone picks up the lower frequency such as bass drum, deep male voice or a bass guitar. The small capsule or small diaphragm microphone is developed for higher frequency signals such as the rightness of an acoustic guitar, the female voice or shimming cymbals. The frequency of mail voice falls between 110-120 hertz, likewise female voice falls between 200-210 hertz and children voices progress in the range of 300-400 Hz. The person who holds higher vibration per second can have a better voice.

Pick a better pop filter and shock Mount

Pop filter is a standard accessory for all voice over artist. The pop filter acts as a wall to reduce the airflow between your mouths onto the microphone capsules. It results in the minimization of plosives, silences and other mouth noises.  Microphones are holed by the shock mounted, which is a mechanical fastener. Shock mount has a beneficial feature that isolates the microphone from the stand vibrations. Individual should be sure before buying the appropriate mic for the voice and bring out your talent in a proper way

microphone frequency response

Test the microphone with your voice

Before purchasing a new microphone, borrow your friend’s headset or from the music store and test your voice out.  If you’re looking for a high- end microphone at your starting stage of voice test. It is a major mistake your performing at you purchase time. First test your voice notes with a lower end microphone and then move to the higher end.

The post How do I Choose the Right Microphone for My Voice? first appeared on Alan Briggs.]]>
Alan Briggs http://www.alanbriggs.net <![CDATA[Can You Plug a Microphone Into a Phone?]]> http://www.alanbriggs.net/?p=59 2020-09-02T09:40:29Z 2020-06-24T12:28:26Z Smartphone’s are generally good at audio sound; the reasons might be handset or network design problems. The external microphone detects all these problems and provides better sounds. Smartphone’s are providing efficacy for on-screen operations such as browning and apps, but when it comes to handset design it doesn’t provide much impact for voice sections. Microphones […]

The post Can You Plug a Microphone Into a Phone? first appeared on Alan Briggs.]]>
Smartphone’s are generally good at audio sound; the reasons might be handset or network design problems. The external microphone detects all these problems and provides better sounds. Smartphone’s are providing efficacy for on-screen operations such as browning and apps, but when it comes to handset design it doesn’t provide much impact for voice sections. Microphones are tiny in structure and problems arise very soon in them. The frequency range in Smartphone’s is lower, perhaps 300Hz to 3.4 Hz. It also uses low-filters and suppresses background noise. The handset that supports the 4Gs voice over LTE or HD voice wideband audio should have proper audio proficiency.

Smartphone’s built-in mic sections and network crises

microphone jacks
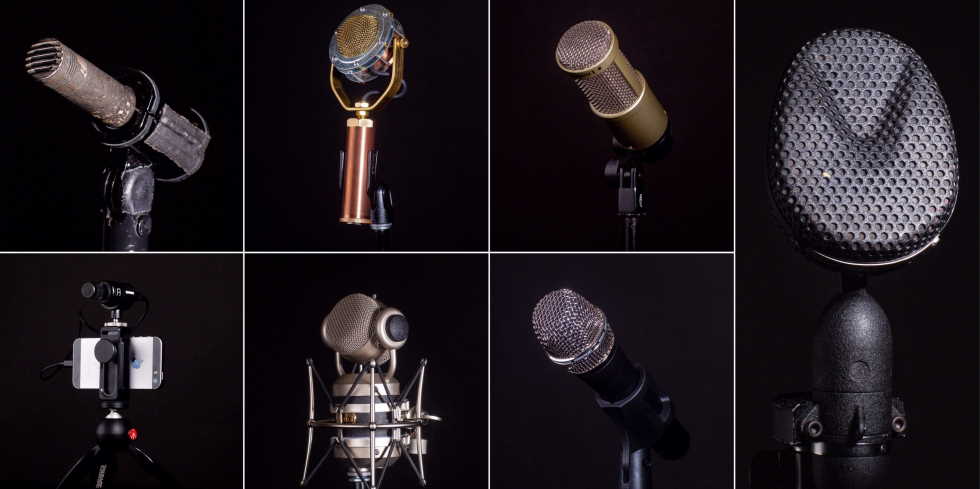
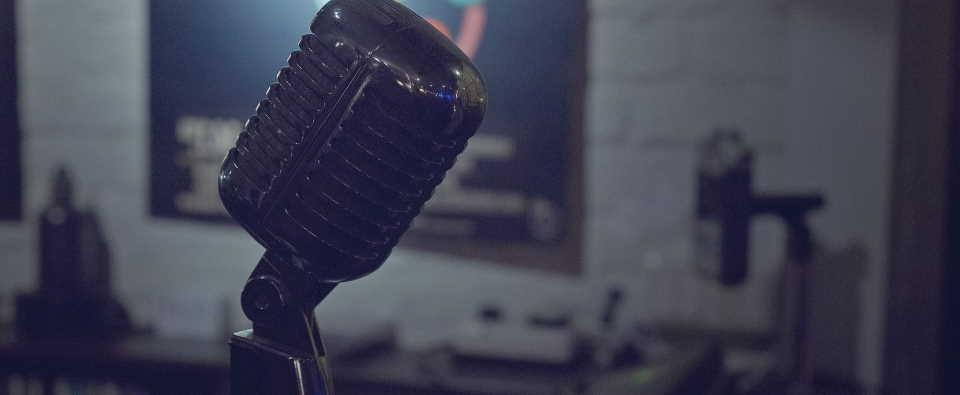
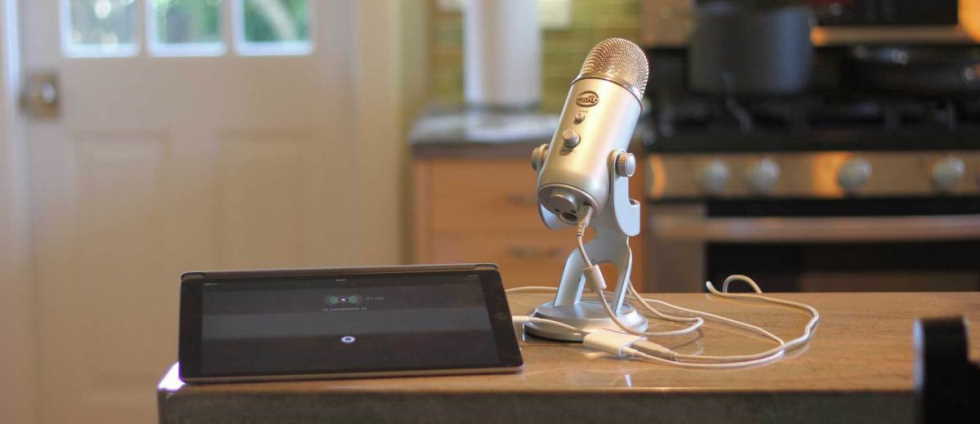
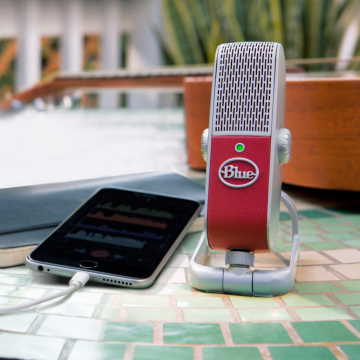
Smartphone’s provide more than one built-in mic, one section of the mic is used for recording while other sections of mic detect and remove the background noises. Smartphone use very low bit-rates at the time of network problems. When the handset and network design offer support, then the HD voice provokes better audio quality. There are two ways to connect a microphone to the phone: a headphone socket and through the micro USB port.

Microphone jacks

In this type, you need to plug the jack in three rings. But the jack holds four connections; one extra band is for the mic. These plugs are called Tip Ring Sleeve connectors. But for mono readings, you should have a TRRS jack version but it can’t handle stereo settings. TRRS jacks come in different forms, with mic connections in a different place. There are handfuls of mic collection available you can choose as per your wish, one of the best mics is Lavalier microphone generally used for TV or to have theatre performance and even for interviews

USB recordings

USB recordings have a lot of advantages. It is performed in digital signal format rather than the analog process. It progresses the audio signal which is built in the Smartphone’s and the US enables better CD-quality recordings. Using USB-OTG plugin a mic into a phone and it has emphasized better audio quality. Day-to-day USB upgrades inability though it also adds the studio-quality cardioids condenser microphone.

Bottom-Line

These above aspects endeavours Smartphone’s hold better audio quality and external microphones will improve the audio recordings. To solve all the problems regarding USB you can purchase stereo digital recorders from companies. It helps to enhance the audio control support in Smartphones and propagate with better recordings.

The post Can You Plug a Microphone Into a Phone? first appeared on Alan Briggs.]]>
Alan Briggs http://www.alanbriggs.net <![CDATA[How to Fix No Sound Issue On the Internet?]]> http://www.alanbriggs.net/?p=104 2020-10-21T08:07:14Z 2020-06-02T09:55:55Z Computer users mostly prefer Google chrome as their default browser option. But most of the time it fails to plays audio and it causes more frustration when you find all other apps have sounds. To fix the sound problem in rower restart your pc or else updates your Windows 10 system. Different ways are available […]

The post How to Fix No Sound Issue On the Internet? first appeared on Alan Briggs.]]>
Computer users mostly prefer Google chrome as their default browser option. But most of the time it fails to plays audio and it causes more frustration when you find all other apps have sounds. To fix the sound problem in rower restart your pc or else updates your Windows 10 system.

Different ways are available for fixing sound problems on the internet. Before checking out technically first of all go through your computer sound system whether it is in mute or un-mute position. Also, make sure the sounds on the web app are audible or not.

computer with Internet

Update your drive

When you find any issue in your computer sound system, the first step you should try is to update your sound drivers. One should have the latest and updated version of the sound driver in the Windows 10 system. It makes your hardware and app to function in a smoother form.

It activates your drive manually or automatically using the Auslogics Driver update. If you try it manually then you should know it takes a lot of time and effort. Go to the manufacturer website for repairing sounds on the internet and find the latest version of your driver which is compatible with your system.

Volume mixer for checking the sound

Windows10 allows you to adjust the sound in a specific app. If you find all the apps have sufficient sound rather than chrome, then there is a chance you might have muted the volume of your browser. You can solve the problem by following these steps.

computer with Internet

Move to the lower right corner of the taskbar and click on the sound icon. Choose the open volume mixer. Move the browser volume slider to a louder volume. Restart your computer and check.

Clear the browser cookies and caches

Cookies and caches are primary files that speed up the loading speed of web pages. These are the reasons of sound issue on the internet. Temporary Data is overloaded in the chrome browser, it causes various issues like lack of audio. So it is necessary to clear your browser’s cache and cookies.

Go to chrome, move to the top-right corner of the Browser and press the customize and control chrome. Now you can see three vertical lines near the address bar. In the list select the more tool option, and then clear the browsing data. Choose your specific time to remove all the data’s.

The post How to Fix No Sound Issue On the Internet? first appeared on Alan Briggs.]]>